Before getting started, have a look at this example that checks whether your Android device has camera.
Camera app in android is quite easy to develop using android camera API. It is just a few lines of code. In the following example, we will simply invoke the existing android camera application in your android phone.
In the UI perspective, I have created an Imagebutton to display an icon. Let me explain the code part step by step.
Step 1:
A quick way to enable taking pictures in your application without a lot of extra code is to use an Intent to invoke an existing Android camera application. A camera intent makes a request to capture a picture or video clip through an existing camera app and then returns control back to your application.
Intent i;
Intent i = new Intent(MediaStore.ACTION_IMAGE_CAPTURE);
MediaStore - The Media provider contains meta data for all available media on both internal and external storage devices.
ACTION_IMAGE_CAPTURE - Standard intent action that can be sent to capture image through android camera application and return it back.
Step 2:
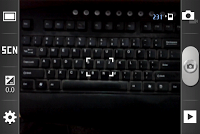
Now lets start the camera intent, through the method - startActivityForResult(). Once the intent is started camera application UI appears on the screen and user can take pictures as usual.
startActivityForResult(i, CAPTURE_IMAGE_CAPTURE_CODE);
i - Intent to start
CAPTURE_IMAGE_CAPTURE_CODE - A constant value (request code), If >= 0, this code will be returned in onActivityResult() when the activity exits.
When this activity exits, your onActivityResult() method will be called with the given requestCode.
Step 3:
The result from the activity will be returned to onActivityResult(int requestCode, int resultCode, Intent data), where we can perform our own functionality to process the result.
requestCode - The request code (CAPTURE_IMAGE_CAPTURE_CODE) that was supplied to startActivityForResult(), using which we can confirm which intent has sent back data.
resultCode - Result code sent back from the intent
data - An Intent, which can return result data to the caller
protected void onActivityResult(int requestCode, int resultCode, Intent data) {
//check which intent has sent back data
   if (requestCode == CAPTURE_IMAGE_CAPTURE_CODE) {
//check whether the process was success
      if (resultCode == RESULT_OK) {
         //perform your own functionality, I have displayed a Toast indication success
         Toast.makeText(this, "Image Captured", Toast.LENGTH_LONG).show();
      }
//Check if the capture failed and perform your functionality
      else if (resultCode == RESULT_CANCELED) {
         Toast.makeText(this, "Cancelled", Toast.LENGTH_LONG).show();
      }
  }
}


In the UI perspective, I have created an Imagebutton to display an icon. Let me explain the code part step by step.
A quick way to enable taking pictures in your application without a lot of extra code is to use an Intent to invoke an existing Android camera application. A camera intent makes a request to capture a picture or video clip through an existing camera app and then returns control back to your application.
Intent i; Intent i = new Intent(MediaStore.ACTION_IMAGE_CAPTURE);
MediaStore - The Media provider contains meta data for all available media on both internal and external storage devices.
ACTION_IMAGE_CAPTURE - Standard intent action that can be sent to capture image through android camera application and return it back.
Step 2:
Now lets start the camera intent, through the method - startActivityForResult(). Once the intent is started camera application UI appears on the screen and user can take pictures as usual.
startActivityForResult(i, CAPTURE_IMAGE_CAPTURE_CODE);
i - Intent to start
CAPTURE_IMAGE_CAPTURE_CODE - A constant value (request code), If >= 0, this code will be returned in onActivityResult() when the activity exits.
When this activity exits, your onActivityResult() method will be called with the given requestCode.
Step 3:
The result from the activity will be returned to onActivityResult(int requestCode, int resultCode, Intent data), where we can perform our own functionality to process the result.
requestCode - The request code (CAPTURE_IMAGE_CAPTURE_CODE) that was supplied to startActivityForResult(), using which we can confirm which intent has sent back data.
resultCode - Result code sent back from the intent
data - An Intent, which can return result data to the caller
protected void onActivityResult(int requestCode, int resultCode, Intent data) {
//check which intent has sent back data
if (requestCode == CAPTURE_IMAGE_CAPTURE_CODE) {
//check whether the process was success
if (resultCode == RESULT_OK) {
//perform your own functionality, I have displayed a Toast indication success
Toast.makeText(this, "Image Captured", Toast.LENGTH_LONG).show();
}
//Check if the capture failed and perform your functionality
else if (resultCode == RESULT_CANCELED) {
Toast.makeText(this, "Cancelled", Toast.LENGTH_LONG).show();
}
}
}
| Camera App |
<b><RelativeLayout xmlns:android="http://schemas.android.com/apk/res/android"
    xmlns:tools="http://schemas.android.com/tools"
    android:layout_width="match_parent"
    android:layout_height="match_parent"
    tools:context=".MainActivity" >

      <ImageButton
          android:id="@+id/buttonToast"
          android:layout_width="150dp"
          android:layout_height="150dp"
          android:layout_alignParentTop="true"
          android:layout_centerHorizontal="true"
          android:layout_marginTop="24dp"
          android:contentDescription="@string/selectdate"
          android:cropToPadding="true"
          android:src="@drawable/camera3" />

</RelativeLayout>
</b>Copyright © 2011 - All Rights Reserved - Softron.in
Template by Softron Technology